Changing Your Backup Location
You can change the default backup location for your entire system database, including your returns. This task is reserved for the Admin user.
IMPORTANT! If you are using an external hard drive as your new backup location, the external drive must be physically connected to the server.
Using a third party back product such as (Carbonite, Mozy, Backblaze, and Amazon Glacier) may require you to change your backup location, to a location the third party product can access.
CCH Small Firm Services does not provide technical support for third-party backup products.
To change backup locations:
- Do one of the following:
- If ATX is open, go to the Support menu; select About; then, click the Admin Console link.
- If ATX is closed, navigate to Start\All Programs\CCH Small Firm Services\ATX 2016\ATX 2016 Admin Console
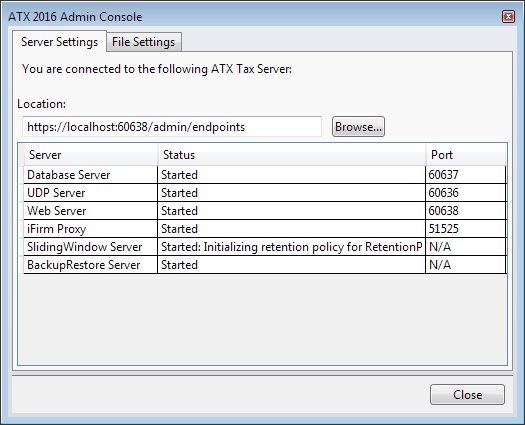
The Server Settings tab provides the location of your physical address of the computer that is your ATX server, and displays the server status and port numbers.

Admin Console - Server Settings tab
The File Settings tab displays the Storage Locations for your File Server and Backup/Restore Server. These default locations may be changed by browsing to another location.

Admin Console - File Settings tab
- Click the File Settings tab.
- Click the Browse button under Backup/Restore Server to navigate to and select a new backup location.
The storage location cannot be changed on a network workstation.
The new backup path must be a physical drive on the server or a fully-qualified universal naming convention (UNC) path to another location on the network. If you use a mapped drive for backups, it must be converted to a fully-qualified UNC path. For detailed information, see the Microsoft article on Naming Files, Paths and Namespaces.
The new location will only be used for backups created after the change was applied. Existing backups will not be moved to the new location automatically. If you want existing backups to be stored in the new location, the files must be moved manually. See Manually Moving Files to a New Location.
- Click Close.
- Restart ATX.
These locations can also be changed on the Backup and Files Preferences tab of the Preferences dialog box.